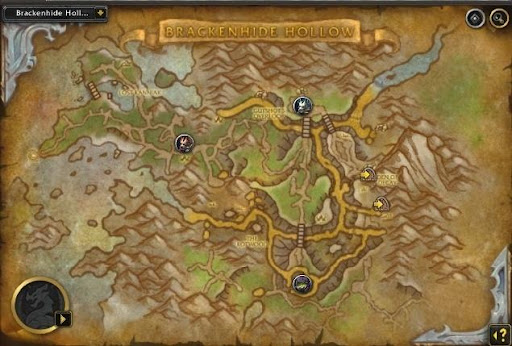
World of Warcraft: Brackenhide Hollow Mythic+ Guide
Season 2 of Dragonflight brings new dungeons for the Mythic+. They contain valuable rewards, such as epics, mounts, etc. All these can be yours with help from WowVendor.
They provide walkthroughs and other information, such as Brackenhide Hollow Mythic+ guide down below. In this guide you can find strategies and tips for normal and boss encounters. And if you need some extra help, a Mythic boost from WowVendor can get any dungeon done in no time.
Brackenhide Hollow
Among the trash packs on your way to the first boss, there are several priority targets that must be dealt with first, or they will cause a lot of trouble.
- Decay Speaker. Your top priority, since they empower other mobs by placing a Rotchanting Totem. And if that was not enough, they also apply a stacking debuff with Withering Burst.
- Bonebolt Hunter. Deals unavoidable damage to the whole group and throws around traps (indicated by green swirl).
- Bracken Warscourge is not that dangerous on its own, but they buff nearby enemies with Pack Tactics. Hideous Cackle must be interrupted, or your party will run around in panic.
Hackclaw’s War-Band
A trio of enemies. The moment the health of one of them drops to 15%, the whole warband gets Bloodfrenzy — so, prefer cleaving enemies, instead of focusing them one by one. Bosses also have Prey on the Weak, which in turn provides them with stacks of Predatory Instincts. Healers need to keep the party topped, but others also need to use their defensive cooldowns and self-heals to ease the job.
- Gashtooth.
► Gash Frenzy — dispel by healing target to 90%. Others should use self-heals as well.
► Marked for Butchery — both self and external mitigation is advised.
► Decayed Senses — needs to be dispelled quickly or blocked by Spell Reflection. - Tricktotem.
► Greater Healing Rapids — interrupt the cast (Purge the buff if the spell was cast).
► Earth Bolt — use any spare interrupts on this one.
► Hextrick Totem — focus it down ASAP, as it prevents the healer from dispelling Decayed Senses. - Rira Hackclaw.
► Her auto-attacks cleave so keep her facing away from the party.
► Savage Charge — DPS can take it with immunities or abilities like Feign Death. Otherwise, the tank should take the hit by standing between the boss and her target.
► Bladestorm — don’t stand in her way. Be aware of her positioning, since she can change targets and move in other directions.
On your way further be aware of Rotbow Stalker. These guys have very annoying abilities such as Pack Tactics, Shoot, Bone Bolt, Bone Bolt Volley, and Scented Meat, making them the primary target for this part of the dungeon.
Gutshot
The second boss has two Rotfang Hyena adds. Defeat them fast, ‘cause the boss will summon more with every Call Hyenas cast. Eventually, the boss uses Meat Toss on a random party member, so be ready to kite hyenas. You should be careful to not step into Ensnaring Trap. Instead, lure hyenas into it, temporarily stopping the chase. Gutshot can free pets with the use of the Master’s Call, so keep some distance even from trapped beasts.
On your way to the third boss, you will meet more new enemies, but the rules are simple — focus down Infected Lashers, be careful when you kill Decaying Slimes because they explode on death (don’t stand in green goo!), interrupt Touch of Decay. Wilted Oak loves to summon a lot of Lashers, so engage them with caution.
Treemouth
The first boss to have energy. Upon reaching 100, the Grasping VInes starts. All targets in the 10 yards zone around the boss get a Consume debuff. At least one player needs to get it, or the tree will enter a permanent enrage state with Starving Frenzy. You also cannot feed the boss the same target twice in a row because of the Partially Digested effect.
- Decay Spray — just dodge, while preparing to deal with adds right after.
- Decaying Slimes — 4 of these spawns, interrupt their casts and kill them (don’t forget about the goo).
- Vine Whip — a homing cleave that follows a tank during the cast, so make sure to not hit the group.
The last stretch before the end is full of new imposing enemies. First of all, interrupt such abilities as Decay Surge and Burst of Decay. Fetid Rotsinger and Vile Rothexer are the priority targets. The first one places a totem that must be dealt with. The second one applies contagious disease, so make sure your group keeps a distance from each other.
Decatriarch Wratheye
The last encounter of this walkthrough, this boss also has an energy bar. Each time it reaches 100, Decaying Strength will be cast. The ability absorbs all Withering Rot debuff from the party, empowering Wratheye for each stack, while also spawning AoE at every player. The size of this AoE increases with each absorbed stack of Withering Rot.
You need to avoid getting the aforementioned debuff. For this, constantly dodge the poisonous cloud spawned by Choking Rotcloud. Another thing to keep an eye out for is the Rotburst Totem — take it down as fast as possible. Following these guidelines will ensure your party has as few Withering Rot stacks as possible.
The last trick of Wratheye is Decaystrike — a powerful double-hit tank buster, so be ready to heal and mitigate through it.
And this is it for our guide! We hope the information here will prove useful in your Mythic+ runs!
Articles You May Enjoy
- Xeno Quest: Mobile MMORPG now available
- NGames, a leading online games publisher, has today announced that free-to-play fantasy MMORPG, Xeno Quest, is available now on Android and iO...
- Guild Wars 2: Heart of Thorns Living World Season 3 Finale Live Today
- Guild Wars 2: Heart of Thorns' third season of Living World finale will be live today.
- Divinity: Original Sin Conquers America
- The little RPG that could, Divinity: Original Sin, began as an idea funded by the fans.


