

Heroes of the Storm Top Battlegrounds Countdown

When Blizzard were first talking about multiple maps in Heroes of The Storm, I was about as skeptical as can be. The MOBA genre has never gotten along well with splitting their playerbase between different maps to fight in, preferring instead that their arena of choice is polished to a mirror sheen. However, I think it works well for HoTS, which really needs the different locations to break up the fact that it’s a bit simpler than its competitors, so the number of game states within any given map are usually fewer. It’s also a nice way of trying to allow members of the cast to be stronger on some levels than others, Murky being the prime example of a character that really needs a map that suits him in order to succeed. This hopefully will sort out the “This character is the same but better” problem in the long term for the game, though currently it isn’t looking like it.
Some of these maps though are obviously better than others. I thought I’d take a quick look at what makes some of these maps good, and what makes some of them… Blackheart’s Bay.
Garbage Tier
Blackheart’s Bay
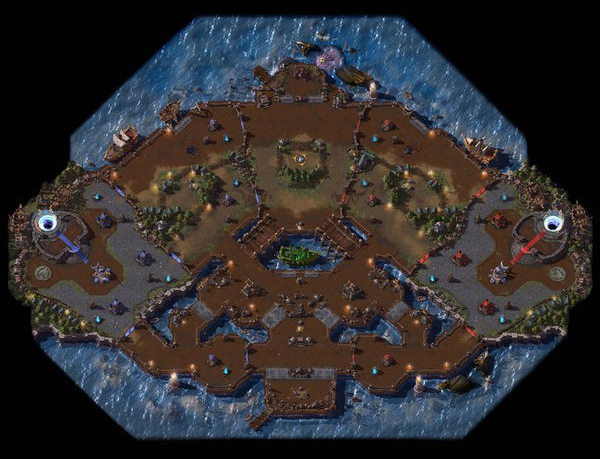
The worst map in the game by far. Blackheart’s Bay is always sure to induce a groan any time it rears its ugly head. Grab coins by clearing camps around the map and breaking the treasure chests that spawn at regular intervals, or by killing others who have done that work themselves. These coins can then be given to Blackheart, who sits between the middle and bottom lanes, in exchange for him blowing up the enemy’s structures.
Blackheart’s Bay is the most snowball heavy map in the game due to the nature of its objective. All the coins that a team collects are worthless if they can’t turn them in, an action that requires a long channel time that can be interrupted by any damage. This means that if a team simply has a better team fight composition granted by the matchmaker you’re going to crush the enemy team early and continue to do so as the game goes on without them being able to ever turn in their coins. Of course a push heavy team could try to outrun the pirate ship, but the barrage is so overpoweringly strong that trying to get into that race is usually futile. Ranked mitigates this problem, as you know what you’re getting in for, but if either team gets a level lead, it’s usually a done deal.
This isn’t always the case, but most games of Blackheart’s Bay will result in a curb stomp. The few tight games can be exciting, but that rarely compensates for dealing with the landslides that occur most of the time.
A lot of this could be fixed by learning the lessons of the later battlegrounds. If blackheart moved around the map then some degree of mobility would be useful, and allow for the changing terrain to give a more varied set of fights. Currently my engagements are usually a tentative approach around blackheart as you try to work out where the enemy team is hiding nearby before a fight breaks out just to the right or left of the pirate captain.
An alternate way to deal with the problem of teams pitching a tent by the nearest LeChuck impersonator is to reduce the channel time on his turn in. This would make camping him much less reliable, and allow for teams to fight over the varied mercenary camps, chests and pirate camps located around the map. Having to control multiple locations is usually a good thing for a map, as it allows a smart team to anticipate where the enemy is going to be and stop their game plan, while a sneaky team can get resources where the enemy team isn’t in order to procure the coins they need to get a turn in they otherwise couldn’t get through a direct engagement.
Controlling Blackheart is the sole objective, as all the enemy’s coins are worthless if they can’t turn them in. As it is right now, I can walk away from my computer, make a cup of tea and still be able to stop someone from turning in after giving them a monolithic lecture about the correct use of hyperbole.
D+; Needs Work Tier
Dragon Shire
Dragon Shire has two points on the top and bottom that you have to sit in to capture for your team. If enemies are also dawdling about in the area, they can stop you capturing, or capture it themselves. If a team controls both points, then that team can get access to the dragon shrine in the centre of the map. After a lengthy channel time, anyone who clicks on the statue who is friendly to those who took the other two shrines can turn into a big dragon man who can set things on fire, boot people about like a cheap football and chop stuff with a dirty great axe. Due to the long channel time the dragon is rarely used against any competent team. Usually if you have enough control of the map to get a dragon, a good few members of the enemy team need to already be dead. This can mean that in the early stages of the game, where you’re dealing with very quick respawns, you’re unlikely to ever see a dragon unless the enemy have fallen asleep. Even then, you’re unlikely to see the dragon very much in the game, since his arrival is usually an indication that one team got wrecked.
This map has no comeback mechanics, so getting back into the game after the first dragon loss can usually be an uphill battle. Still, given the power of a late game dragon, a losing team that gets a lucky break can turn things around by setting the enemy team’s base on fire and punting any survivors away from the buildings they need to protect, usually netting them two or so important structures before the enemy team respawns.
It’s not an entirely awful map, but the way that a team needs to control three points, all in the dead centre of the map, means that the mechanic for winning is almost unnecessary. The dragon simply states “If you’re winning, then just win more”.
Haunted Mines

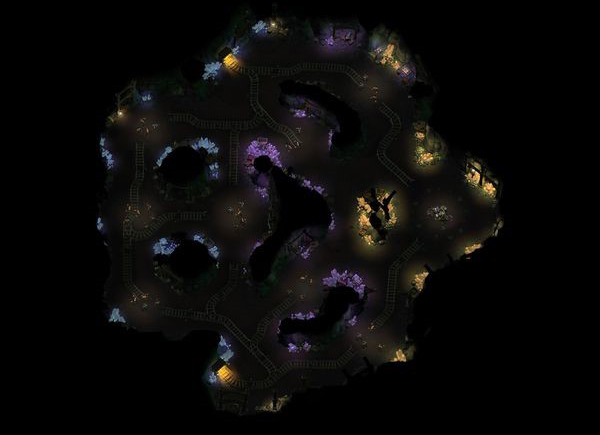
This map is actually two small maps, meaning that global jumps and teleports are largely useless.
The transitions between the maps are clumsily done, requiring the player to click on the tunnels, then click where they need to get to in the mines once they’re through. The lack of pathfinding between the two feels clunky, often making the player have to take their attention from watching how a team fight is progressing just to get their lumbering mass of a hero into the spot they want to. These tunnels are obvious bottlenecks, providing a major advantage to any team camping on the inside of them as you know a portion of the enemy team are going to have to engage you the moment they step through the tunnel, and the moment their camera snaps into the mines provides a moment of disorientation the camping team can abuse to drop as much crowd control and damage as possible onto their victims.
There is a very set rhythm to the map that makes each game feel very predictable. While each map has set timings, where you go and what you’re doing is more choreographed than other maps due to the bottlenecks and the timing on the various objectives. Wait for the mines to open, run into mines a few seconds ahead of the minion camp spawns, kill some camps then fight the enemy team. Then depending on if you win or lose you either go kill the big golem (if you won) or go take as many mercenary camps as possible (if you lost). Rinse and repeat.
The odd nutter backdooring with a specialist is the only way this tempo usually gets broken, and that trick usually only works very early or very late in the game.
The map’s “Dare you enter the mines?” phrase is so wonderfully cornball, and is delivered with such relish that it almost lets me forgive this map’s shortcomings. Almost.
The least bad of the bad maps. The Revenge of the Sith of maps. Much of its problems could be solved by either adding more entrances to the mines or by making so the pathfinding automatically uses the tunnels instead of them having to be used manually. Both of these would be good, but either one would improve the map a fair bit.
Enjoyable Maps Tier
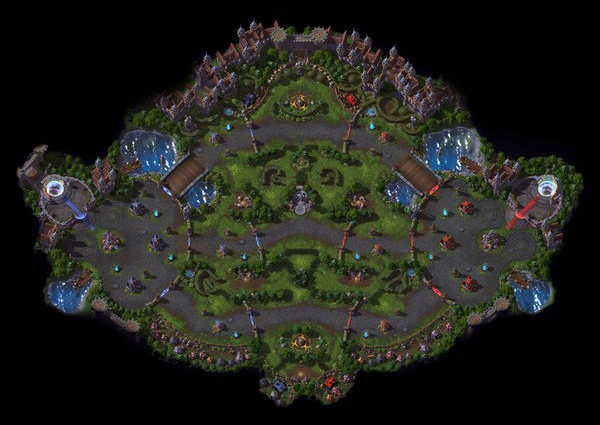
Garden of Terror
One of the other reasons I’m not fond of the Haunted Mines is that the Garden of Terror takes the same idea of periodically beating up creeps outside the lane and executes it better. The only major change being that when one team kills the little plant men and gets the seeds from their corpses, they can turn them in and transform into a big plant monster. This means that even if a team is behind, they don’t lose out since their own attempts to gather seeds aren’t nullified when the enemy turn in, which allows for the losing team to still be able to get a few turn ins of their own. This makes games where you take nothing from the enemy a rarity, and close games are common.
Keeping all the creeps all on the same map allows for freer movement, as players can choose to approach the seed camps conventionally, dive through the walls using abilities, or even snipe from a distance through the fog of war. The two big creeps lets players choose to either give each team an equal share for little risk, or put both bosses on the line with a team fight, winner takes all.
My only real problem with this map is that big stompy plant monster is actually a bit of a wuss. Its kit, when you transform into it, is better suited to a hit-and-run style of play, rather than acting like the towering murder-colossus that it looks like.
Tomb of the Spider Queen
The map most similar to normal MOBA play. You kill minions, collect gems and turn them in to get some big spider monsters to run down all three lanes and wreck whatever they bash into.
This map solves a lot of the problems in Blackheart’s Bay. Gems are unable to be taken by the enemy team, but are still able to be picked up by allies. This makes snowballing gems and getting massive turn ins harder, as you’re not vacuuming up all of the enemy team’s efforts from a single team fight. There is still a flat reward of three gems per kill, but this is only as rewarding as a normal creep wave. Getting kills will usually set up a team for taking the boss in the top of the map, and they’ll be able to get a lot of extra gems from the free pushing they’ll be able to do, so getting kills is still rewarding enough, without it being utterly crushing for the enemy.
A bad team fight that loses you a lot of gems can be crippling early on, and will often put your team on the slippery slope to defeat. Turnarounds are possible on this map though, but they can be hard work. The main way a team on the back foot can get themselves back in the game is by grabbing the boss at the same time as a gem turn in, allowing them to pressure the enemy team all over the place while also slamming home into the top lane. The problem though is that the spider monsters can be rather weak later in the game, unlike most of the other map mechanics, so they are usually not worth much without a boss. If the boss has just been used by the winning team to smash up the place, however, the losing team can be forced to wait some time for their opportunity.
Vision is an interesting one on this map, as you are always blinded when trying to walk between the lanes, making them dangerous places to be. This encourages cautious players to stick to their lanes, but also to reward the risk taking player with easy ambushes since the enemy also will be blind to their approach. Skirmishes around the hand in points often need skillshots and scouting tools in order to guarantee control of the area, or having warriors ensure the safety of their team by shoving their faces into the nearest foggy area.
Cursed Hollow
At set intervals, a blue bird totem will appear at one of a few set locations around the map. If a hero can channel near the totem for a few seconds they’ll get rid of the totem and score a point for their team. If a team gets three points, their opposition will be cursed, reducing the hp of all their minions to 1, and preventing structures from being able to attack for the duration. While this seems pretty strong, it would take far too long for any minion wave to destroy any of the enemy’s important structures. Usually a team will use the curse time to go break things themselves, or go grab a boss or two.
The curse itself is probably one of the weaker mechanics, especially since you need to win three team fights, and endure yet another channeling mechanic (though this is the least awful of the three maps that use it). Allowing the enemy to get one or two points in exchange for a split push can often be an entirely legitimate strategy on this map, especially if your team can stall the enemy at the point long enough to get an important structure.
Of all the maps, this is the one that can swing the hardest. A team can get a curse early, ram into the enemy’s base fast and hard, only to get their offense utterly shattered, cede both the boss camps and watch their core suddenly explode. It’s not even that the map’s mechanics allow for the two teams to always be close, it’s simply that the combination of taking multiple bosses alongside the curse that shuts down all defense against said bosses can allow a team to swing the whole game on a single well timed team fight. I personally like this insane pendulum swing, as it provides tense games where one slip up can bring about disaster. I can absolutely sympathize though with someone that hates this maps due to the sheer frustration of having been ahead all game only to have it be lost just because one idiot teammate decided to go stick their thumb up their ass rather than join in an important team fight.
One of the reasons I can forgive the channeling mechanic in this map is that the thing the hero interacts with is not in a static position. The shrines moving about means teams can’t always be in the right spot to shut down the map’s primary mechanic. There is a lot more mad dashing for a goal rather than a five man crush squad pitching a tent in it. This also gives a more frantic air to the team fights, as people tend to just engage as they arrive, escalating the fight as more and more people pile into the fray (Or don’t, because they’re doing’ something sneaky elsewhere).
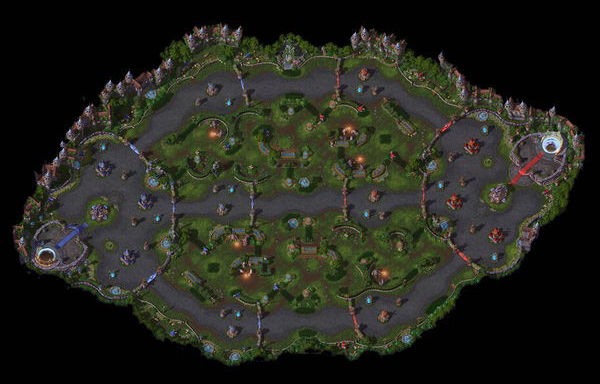
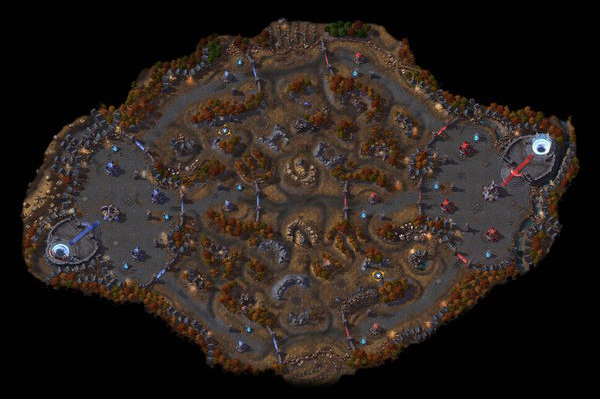
Sky Temple
This massive map is a more traditional control point map, putting Dragon Shire to shame. Run on a point, fight the bad dudes that spawn, watch the control point shoot rad lasers into the enemy team’s buildings. Repeat until everything on the enemy side has exploded.
The only key choices in this map are which points to grab, and how many people should go for each point. While this can seem limiting on paper, it actually winds up being one of the more interesting maps since people can happily back door or secure a boss in addition to working out who to send after what point.
Do you go for a clean 2/3 split between two points, send your one specialist to do a point and hope they don’t get crapped on while you murder the rest of the team with a numbers advantage? Perhaps you don’t give a damn about the points in the late game, and opt to just smash the enemy team with a five man gank squad on one point, trying to secure what you can while they’re all dead.
Due to the way you can sneak in a few hits from a laser on points the dominant team aren’t guarding, this map usually remains tight to the end. It can be fairly dependant on certain team compositions though, since not having a warrior or specialist that can solo a point limits a team’s options considerably. Unlike some of the lesser maps though, this isn’t a sign of a certain loss, but rather that a team has to be aware of their disadvantage.
Battlefield of Eternity Tier
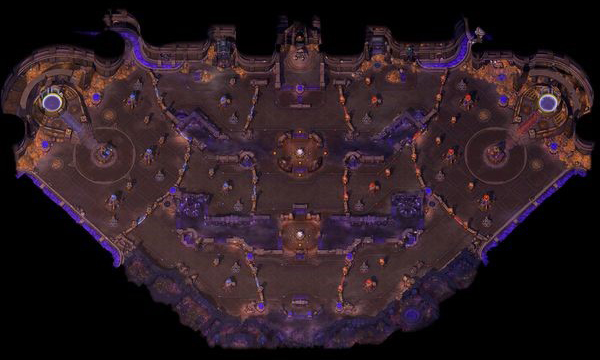
Battlefield of Eternity
The latest and greatest map in the game.
Two big immortal beings clash in the centre of the map, taking one of four spots opposing one another. They’ll change positions when either of them reaches half health. Each immortal fights on behalf of one the two teams, representing the forces of heaven or hell. This looks a bit silly when Diablo is fighting for the angels, and Tyrael is fighting on behalf of the devils, but HoTS has always had the mentality of “Don’t think too hard about it.” If the opposite team’s immortal is slain, then their own immortal runs into the lane and starts wrecking everything in their path, keeping whatever health they had during their battle as an extra shield on top of their newly replenished health bar.
The way that the immortals move around ensures that a team fight doesn’t just keep to one spot, and instead roams around the centre of the map. There’s a lot of team fighting on this map, so it’s great that it’s always on the move, with areas of safety and danger that can shift around. This singular element shows how far Blizzard have come in figuring out what works in their game, and how it can be kept interesting over the course of the game. It keeps what little fun parts existed on Blackheart’s Bay and makes them work out far better, while also coming up with strengths of its own.
The immortals offer a great risk/reward challenge, as you can fight under your own immortal to try and kill the enemy team if you are at a disadvantage or go on the offensive and attack the enemy immortal. While trying to damage race the enemy team can be fun, it’s often not a great idea. On the fly decision making can make it rather chaotic as different members of the team all rush off to secure different points, but this can be sorted with just a few pings.
A small detail on this map I rather like is the outer walls, allowing players to sneak around the edges of the map, and either steal a mercenary camp or get off some unexpected ganks.
Not Out At The Time of Writing tier
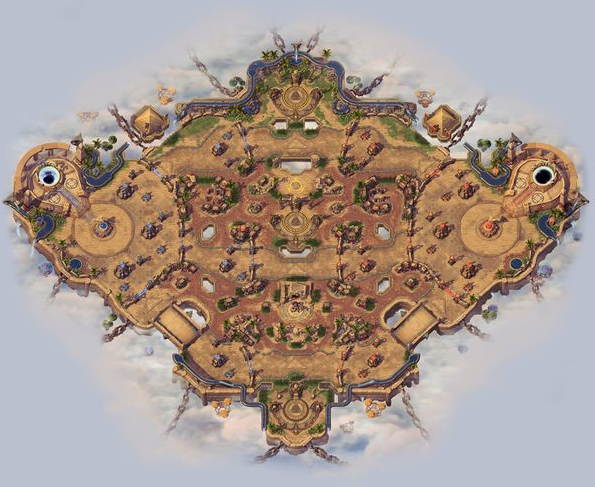
Infernal Shrines
Looks like Sky Temple, though with a slightly different focus. Capture stuff, deal with creeps and summon a big monster if you hold the point long enough. Said monster then goes and makes life miserable for enemy team, allowing you and your friends to go wreck their stuff. The abundance of nooks and crannies will likely make Murky players happy, while giving lots of ways to screw with enemy sight lines. Specialists will be loving this map, as they can grab objectives to help them team fight, then use the distraction to ram home. The downside though is that without something to get the enemy off the point, they likely won’t get to that happy place before their foes break them over their metaphorical knee.
That’s my own thoughts, ramblings and conjecture about the Nexus’ various worlds. What’s your take?
Next Article

Articles You May Enjoy
- Planet Calypso: Eomon migration period is here
- Planet Calypso AB, operator of the longest established planet in the largest Massively Multiplayer Online Real Cash Economy (MMORCE), announce...
- Elsword Introduces Hyperactive Skills
- oday KOG Games, publisher of the hit free-to-play action MMORPG, Elsword, have challenged the Elsword combat elite to unleash their true warri...
- Cubinet Celebrates a Decade of Games with MIA Online and Triple Chain News
- Cubinet Interactive is proud to announce they recently celebrated a decade of online games with an intimate get together.


